Adding The Booking Calendar To Your Website
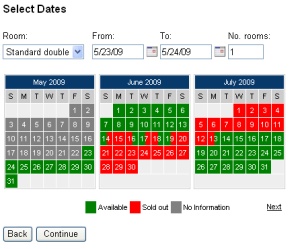
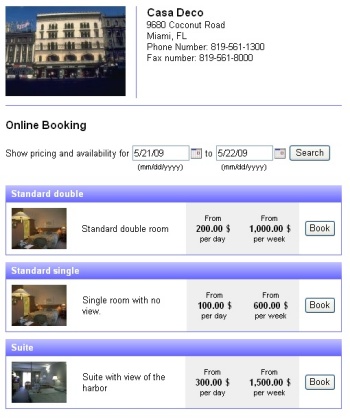
The booking calendar is a plug-in component from WebReserv.com that allows you to take reservations/bookings directly from your existing website or websites. The booking calendar has all the functionality needed for a customer to complete the booking process online:
- Availability search
- Rate/price details
- Deposit details
- Credit card and PayPal payment processing
- Email confirmation
- Terms & conditions
Note: If you don't have a WebReserv.com account already, please click here to create your free account.
The booking calendar is most often used together with the business listing on WebReserv.com. Having your business listed multiple places greatly enhances visibility to the marketplace and helps you to get more customers.
The booking calendar can also be used for businesses that do not need a business listing on WebReserv.com. For more information about this usage, please contact your WebReserv Support team.
Configuring the online booking calendar
To add the booking calendar to your website, log on to your WebReserv account and go to Website - Booking Calendar.
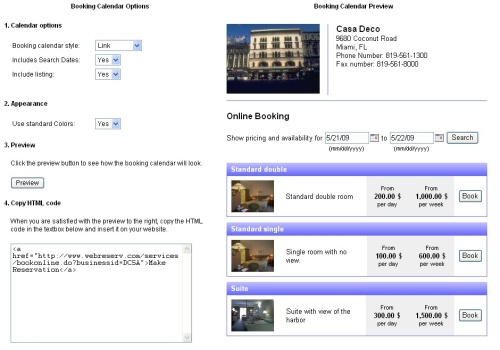
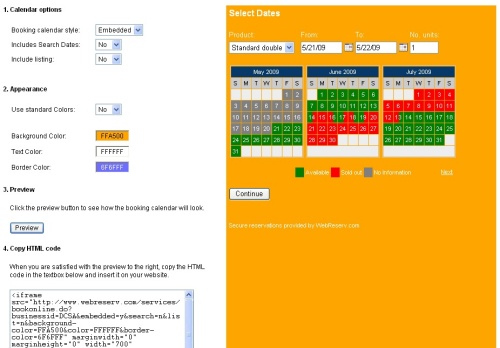
On the booking calendar page you can specify how the booking calendar will look on your website. The different options are detailed below.
Style: Specifies how you want the booking calendar to appear on your website. You can choose between Link (default), Embedded or Button. The Link and Embedded options are the two most popular methods. With the link method, you'll get a link that you can add to your existing website. When a user clicks the link on your website, the user will be forwarded to the booking calendar where the availability can be viewed and reservation(s) can be made. The button works in the same way, except that the user will see a booking button instead of a booking link.
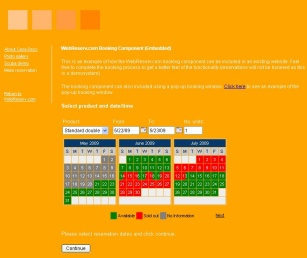
The embedded option is slightly different. With the embedded option, the user will stay on your website, but will see the booking calendar inside your website. There is also a difference in what is shown in the booking calendar: when the booking calendar is opened with a button or a link, it will have a header with your business name, address, contact information and a link back to the website. The embedded calendar does not show the business information as this information usually is shown on the website.
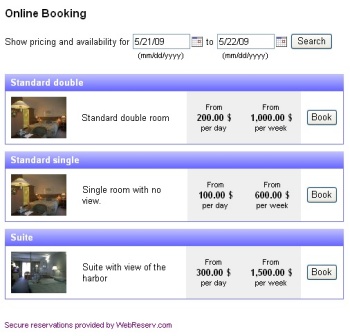
Include Search Dates: If this option (and include listing) is set to yes, the customer will be able to search for a specific date range to view availability and rates across all your products.
Note: Include search dates has no effect if include listing is set to no.
Include Listing: If this option is set to yes, the customer will see a list of all products/units/activities/tours. If it is set to no, the booking calendar will not show a list of products, but will instead show a detailed reservation calendar.
Preview
After selecting the style of your booking calendar, click the preview button and a preview will be shown on the right side of the screen. If necessary, you can change the options and click preview again to see how different settings affect the booking calendar.
Customizing booking calendar colors
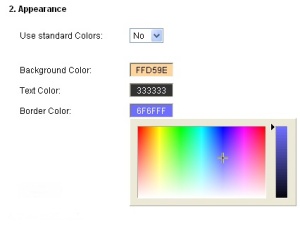
In many cases you'll want to have a booking calendar that uses the same colors as your website. To customize the colors, select no to Use standard colors.
You can customize three types of colors in the booking calendar: the text color, the background color and the border color. To change a color, simply click the corresponding color field and pick the color from the color selector. If you know the RGB code (hex) you can also enter this directly in the color field.
After changing the colors, simply click the preview button again to refresh the preview on the right side.
Adding the booking calendar to your website
When you are done customizing the booking calendar, copy the HTML code from the code window on the left side of the screen and paste the HTML code into your website editor at the place where you want the link, button or calendar.
Congratulations - you have now completed the booking calendar customization and setup process.
Advanced options
Controlling what products/units are shown
In addition to colors and fonts, you can also control what product (or room/tour/unit) should be shown and selected as the default product in the list.
Here's an example of a regular availability calendar URL:
https://www.webreserv.com/services/bookonline.do?businessid=DCSATo filter the products in the product list, add productfilter=[productid]. You can include multiple productid's, separated by comma. Example:
This availability calendar shows only the standard single:
https://www.webreserv.com/services/bookonline.do?businessid=DCSA&productfilter=5And here we show the standard single and standard double:
https://www.webreserv.com/services/bookonline.do?businessid=DCSA&productfilter=5,6To make a specific product the default, include the parameter ptid=[productid]. In the URL below, we include all products, but default to the suite (productid 7):
https://www.webreserv.com/services/bookonline.do?businessid=DCSA&ptid=7Tip:
You can find the productid for any product by logging on to the Administration module, and select Setup - Product & reservation rules. The productid (ptid) is shown in the website address bar when a product is selected.
Using the booking calendar with multiple properties/locations
For businesses with two or more business locations (or properties) it is often desired to use the booking calendar for all locations (or properties). This can easily be accomplished with WebReserv.com.
If each location is shown on a different webpage, simply add the booking calendar to each webpage with the businessid parameter for that particular location.
If there isn't a separate webpage for each location, as it typically happens when the locations are similar and offer similar products (or units), simply add each businessid to the businessid parameter. For example:
http://www.webreserv.com/services/bookonline.do?businessid=DCSA,DCSB,DCSCAdding multiple businessid's to the URL will cause the booking calendar to show a drop-down list with each location next to the product selection list. (Note: activation of the drop-down list may be required. Please contact WebReserv.com support for more information).
Booking Calendar Parameters
| Attribute | Description | Example |
|---|---|---|
| agent | Instructs to use store the agent code specified in the parameter as the agent code for the reservation. | agent=supertravel |
| background-color | Controls the background-color. Use this parameter to change the background color. The default background color is white. | background-color=orange |
| businessid | The business ID of your business | businessid=dcsa |
| border-color | Controls the border-color. Use this parameter to change the default border color. The default border-color is light-blue. | border-color=4e4e66 |
| color | Controls the text color. Use this parameter to change the text color. The default text color is black. | color=green |
| css | Rather than controlling each attribute, you can specify a stylesheet with all the attributes. Using this attribute requires more extensive knowledge of Cascading Style Sheets (CSS) and website design. | css=[URL] |
| dateformat | Instructs the calendar to use a specific date/number format rather than the date format returned by the browser. | dateformat=en_GB |
| displayonly | Causes the booking calendar to be show as displayonly, i.e. a customer is not able to actually complete a reservation. | displayonly=y |
| embedded | Instructs the booking calendar not to show the company name and picture at the top of the screen. This option is intended for embedded booking calendars. | embedded=y embedded=n |
| language | Controls what language will be shown. This parameter is only valid on the WebReserv.eu site. |
language=es |
| list | Controls if the product list should be shown. Default is y. | list=y list=n |
| search | Controls if the search dates should be shown. Default is y. | search=y search=n |
| showcategory | Controls if a category selector should be shown. Valid values are: 1: Don't show category selector 2: Show category selector before product list page 4: Show category selector on product list page 8: Show category selector on product page |
showcategory=2 |
| showrates | Controls how many rate columns to display in the product list. Valid values are 0 - 10. Set to zero to remove the rate columns from the product list. Note that removing the rate columns also removes the availability status from the product list (availability will still be shown in the availability calendar). |
showrates=0 |
| style | Controls various presentation aspects of the booking calendar. Valid values are:
|
style=narrow |
| productfilter | Controls what products to include in the product selection list. By default all products for the specified businessid is shown. | productfilter=7,8 |
| ptid | Controls what product is shown as the default product. | ptid=1032 |
Useful Tips & Links
More information
To get started with WebReserv.com and to get a booking calendar for your website click here.
For more information about the online booking calendar, please visit the resource center
For latest news and updates, please visit our blog at: http://webreserv.wordpress.com/
