|
Creating a new template |

|

|
|
|
Creating a new template |
|
|
Creating a new template
|
Creating a new template |
|
|
|
|
Creating a new template |
|
|
In addition to using the standard email templates, you can define your own email templates for a more personalized touch. This is a great feature that allows you to communicate easily with your customers and give them the assurance of their reservation.
You are able to custom any email template in the system. See instructions below:
Go to Setup - Templates.
On the Setup Template page, you will see a complete list of all system emails available to your business. To customize, click Add Template.
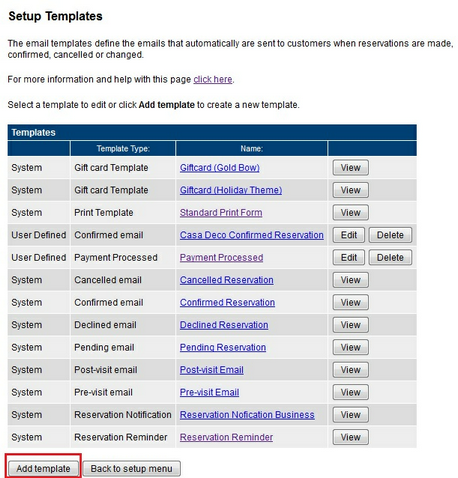
Add Template
A pop up box will open and you can choose the Template Type you want to customize. Click Continue.
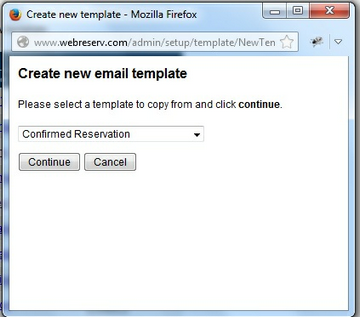
Choose Template Type
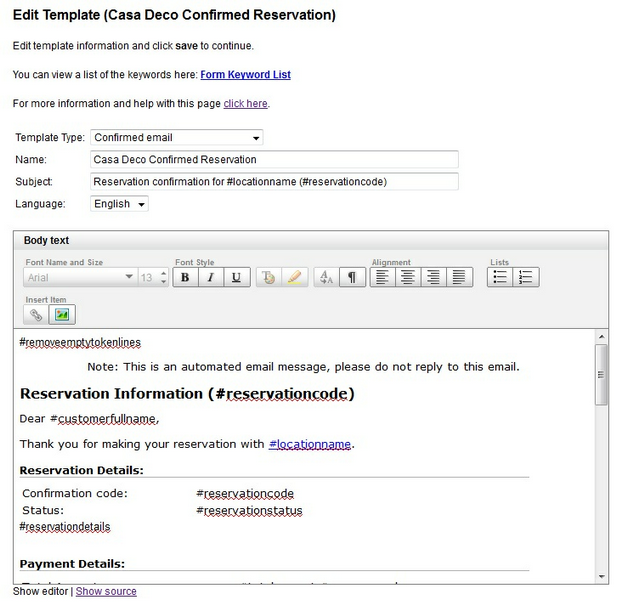
This will open up the chosen email notification that will be in editable form. There are different options for customization. See below.
Template Type
The selected template type you chose will be shown here. If you decide you use another type, you can change it by using the drop down menu.
Name
Enter a name for this template. The name is important as it will be used when you later associate the email template with one or more product(s).
Subject
Enter the email subject in the subject line. The subject line can include one or more email keywords.
Language
For WebReserv.eu businesses, you can choose the language. Note: this option is not available to businesses in US.
Body
Enter the email body. You can either enter plain text or HTML encoded text. To edit using the HTML format, click the Show Source link at the bottom of the page. The body text can include one or more email keywords.
When you are done with your changes click save to save your changes.
Customization Tips
When customizing templates, see a few helpful tips below.
Adding pictures/logos. The standard template will include a thumbnail picture of the product it is associated with by default. This is the picture that you added in the Product setup. As an option, you can add a logo to your template or another picture by clicking the "Insert Image" button in the Editor. In order to add an image or a logo, the picture needs to be located somewhere on the Internet, such as your webpage. Add the URL for the image/logo in the Image Options box.

Adding an image/logo
Using Template Keywords. The system has built in keywords that can be used to customize any template. The keywords correspond with details about the reservations such as payment details, customer information, or additional options. When used, the keywords will find the correct information based on the reservation. You will notice in all the standard templates that many keywords (i.e. #reservationdetails) are used. You are able to add additional keywords to any email template or print form. See a complete list of available keywords by clicking here: Template Keywords.
Adding Additional Text/Information. You can easily add additional information to any template using the template editor. When adding the text, it is best to keep the format of the template the same as the existing information. In order to do this, simply copy a section in the template such as Payment Details and paste in the template where you want the additional information below. From there, you can edit the text with the information that you want to add. See example below.
In order to add the section, Additional Information, I copied (Ctrl C) the entire Payment Details section and then pasted (Ctrl V) it below. From there, I updated the text and added new template keywords that corresponds with the information I wanted to capture.
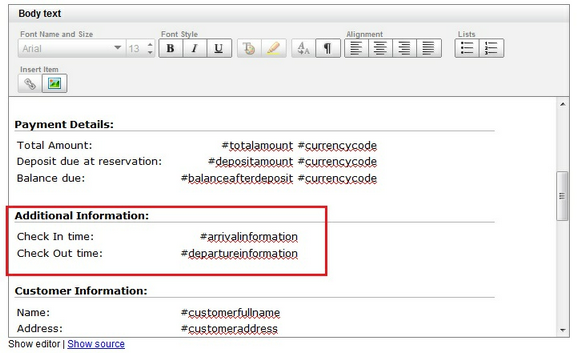
Adding Additional Text
Important! When adding text or HTML code (using the Source editor) to an email template, it is recommended to not copy and paste from a Word document. Word and other word processing programs will often add additional characters "behind the scenes" that will affect the way the template is viewed to the customer. Instead, it is best to create the text or additional HTML code using Notepad or another text based editor. |
Creating a template that isn't too spammy. When adding additional information, text, or pictures to a new email, it is important that you are not creating an email that appears to be spam to your customers. See a few tips below that will ensure that your email will clear your customer's spam filter.
| ▪ | Avoid phrases that are often seen in spam emails, such as "Once in a lifetime opportunity!" or "You don't want to miss this!" |
| ▪ | Don't use too many exclamation points or other symbols (such as too many dollar signs) in your sentences. |
| ▪ | Refrain from using anything that is ALL CAPS. This usually translates into yelling, and customers won't like to see it. |
| ▪ | Keep your colors and fonts to standard black and 10 or 12 pt size. |
| ▪ | When adding images, make sure there is text around it. Spam filters cannot read images, so if there is little or no text, then it may land in the spam folder. |
After you have created a new email template, you must select the email template from the product setup.
For more information. . .
Associating new template with your products